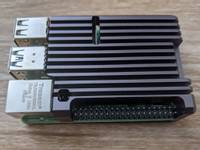
Pimoroni heatsink case assembly
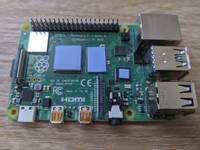
I recently got my hands on a Raspberry Pi 4 to add to my network thanks to Pimoroni, and of course it wouldn’t be complete without a cooling solution. Pimoroni also offers a heatsink case which both protects and passively cools the computer. Since the Pi 4 runs hotter than previous versions, I wanted to make sure it would have plenty of cooling, and this case was exactly what I was looking for. It gives 10-15 degrees of passive cooling according to their testing!
The design has been updated since the tutorial was written on how to put it together: there are now three contact points and three thermal pads, one each for the CPU, RAM, and USB controller. I think that’s a great change since there have been issues with the USB controller running hot on the Pi 4.
It’s pretty straightforward how to place the thermal pads, and apart from that the case assembly is the same as in the tutorial. This is how I arranged the pads to conduct heat to the case:

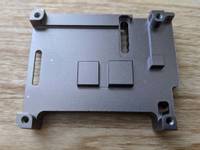

By the way, if anything goes wrong and you need new thermal pads, these are the dimensions to save you some time (they all look like 1mm thick thermal pad):
- CPU: 13 x 14 mm
- RAM: 15 x 9.5 mm
- USB controller: 5 x 5 mm ( this could arguably be bigger to cover the whole chip package, but the contact point on the case is only about this big anyway)
It seems to work really well so far, and I feel confident that it’s going to cool the snazzy new Pi 4 efficiently. I don’t plan to do extensive thermal testing or anything, but it feels warm to the touch after a few minutes, so I know it’s spreading the heat out. This post isn’t sponsored in any way, I just really like the products featured here and I want to share information about how they work.